AppCenter Push Migration Guide
In February of this year, Microsoft announced the retirement of AppCenter Push. A SaaS (or MBaaS, as it's being called by Microsoft) used by many software developers and companies to easily integrate Push Notifications for mobile devices in their products.
A lot of developers are left with a question: How can I extract/migrate my existing customers to another service before AppCenter is being retired on December 31st, 2020?
At the time of writing this blog, Microsoft still did not provide a clear guide to migrate existing clients from AppCenter Push to another service. They did however provide a way on how to switch to Azure Notifications Hubs. But this guide results in the inability to send notifications to previously connected devices unless they open the application again.
So, how can existing clients be migrated?
When you register a device to AppCenter Push, the device will send its unique ID provided by it's OS to AppCenter's Servers, which is used to make the device available to send notifications to. When you send a notification through AppCenter's API, the service will redirect the notification to the device using its ID. We can extract those IDs from AppCenter's API and move them into an Azure Blob Storage. The ID's in the backup file on the Azure Blob Storage can be imported into another service like Azure Notifications Hubs or a competitor like AWS SNS.
AppCenter Push provides support for 3 different platforms for notifications:
- Apple iOS devices use Apple Push Notification service (APN)
- Google Android devices use Firebase Cloud Messaging (FCM)
- Windows devices use Windows Notifications Services (WNS)
This guide will only focus on the extraction of IDs from Apple iOS and Google Android devices. This is because, at the moment of writing, I don't have any registered Windows AppCenter Push devices. But, extraction of the IDs should be exactly the same as with the iOS and Android devices.
Pre requirement: Create an Azure Blob Storage for your backup.
First of you are required to have access to an Azure Blob Storage instance, which will be used to store your device IDs backup. You can skip this step if you are in possession of a Shared Access Signature URL (SAS-URL) to access a Blob Storage Container.
NOTE: The SAS URL will only be accepted by AppCenter's API if the Azure Blob Storage instance is of the BlobStorage kind. GeneralStorageV1 and GeneralStorageV2 types don't seem to be supported.
- Register/login to Azure's Portal. (It may require a credit card or other billing method to continue)
- Create a Blob Storage instance.
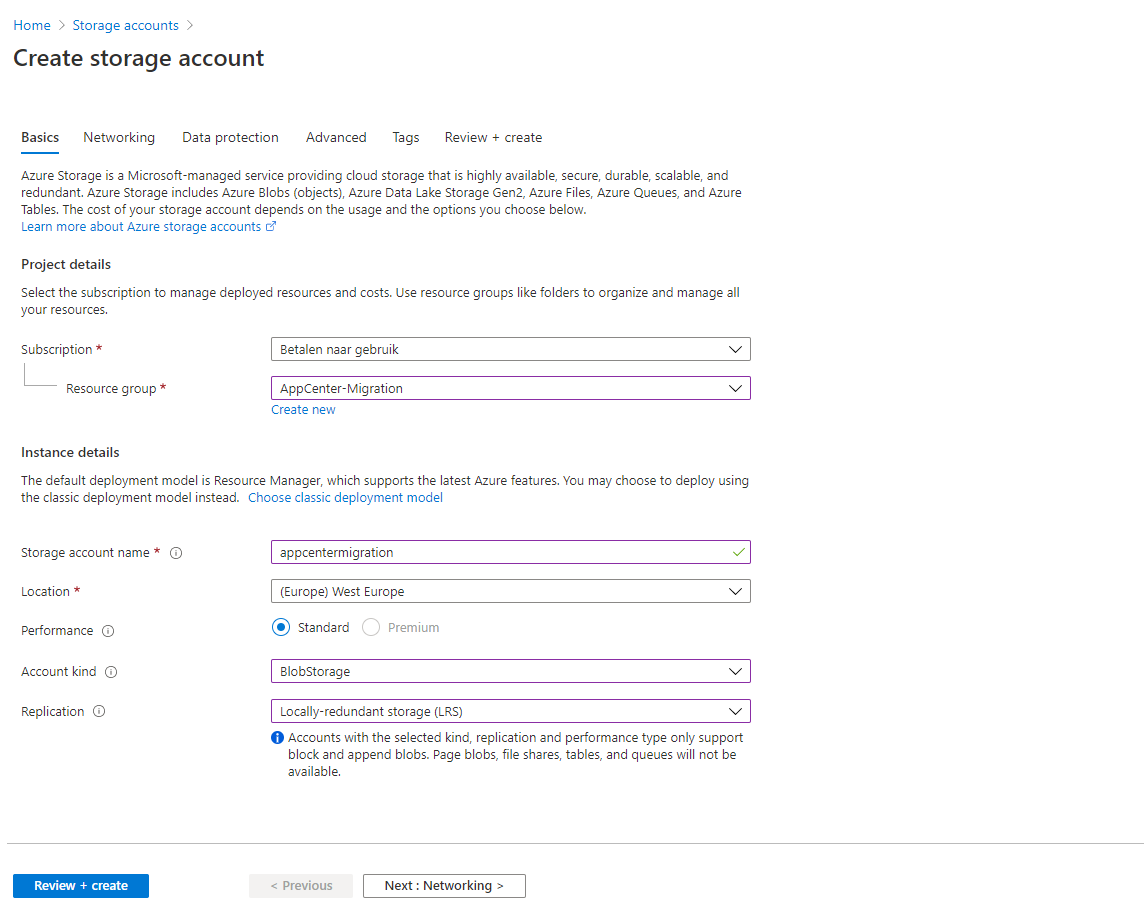
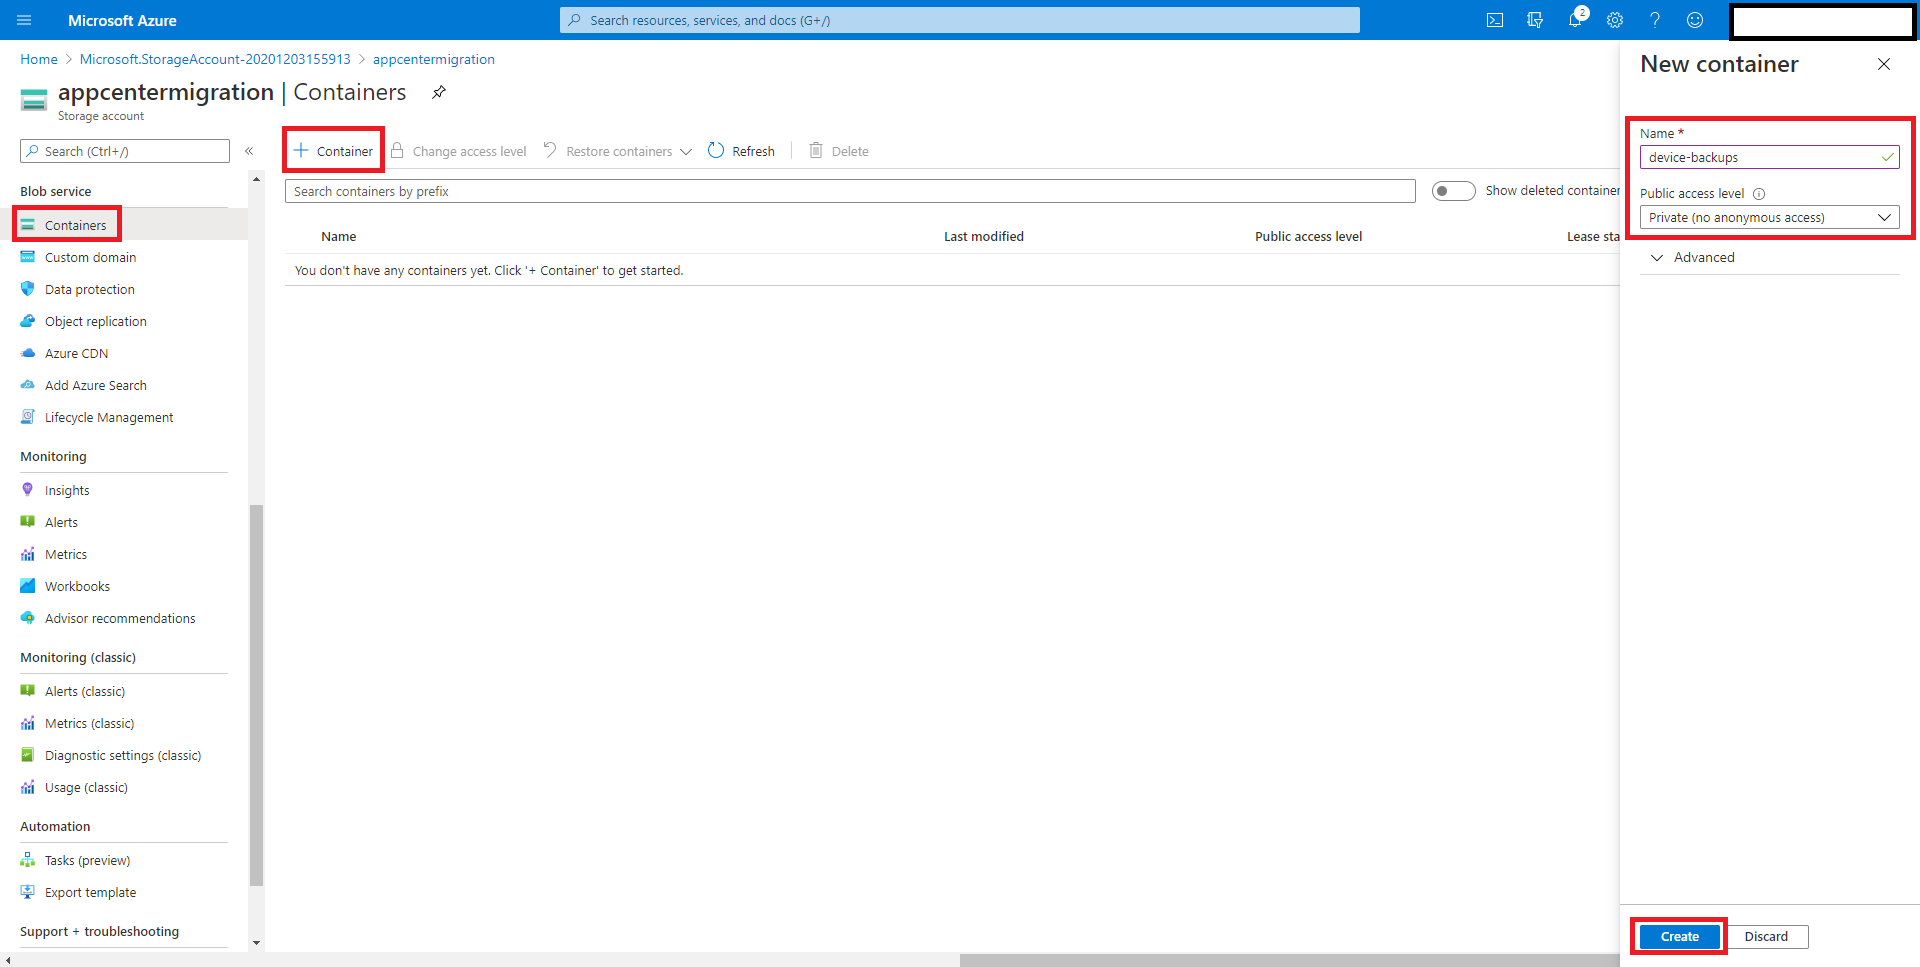
- Create a container wihtin the instance to hold the backups.
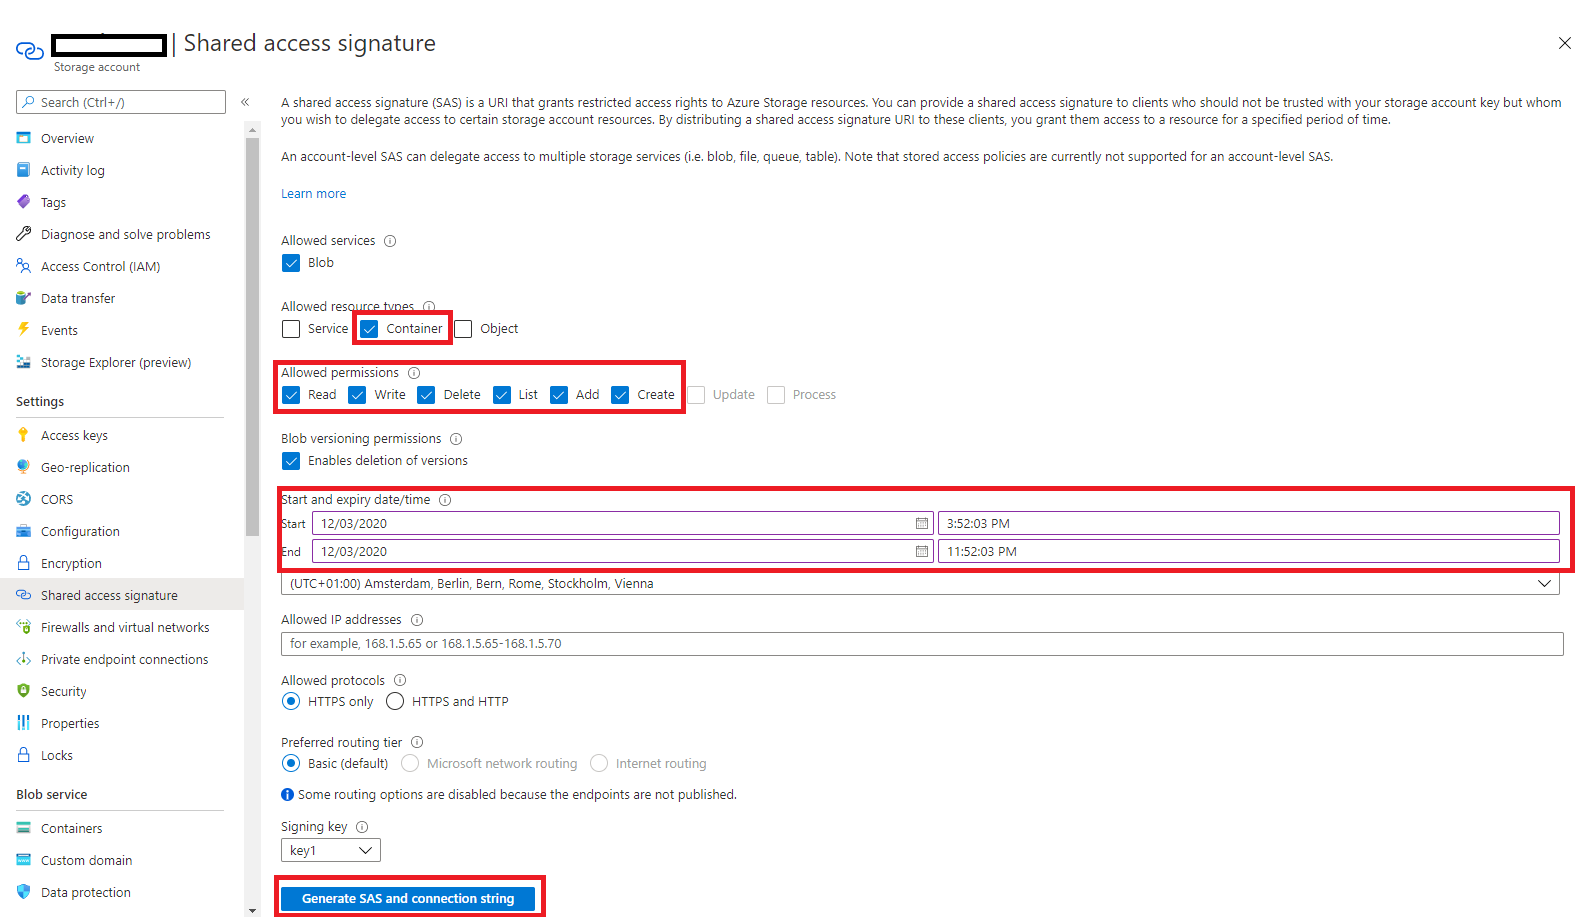
- Create a SAS which grants access to all permissions on the storage and store the generated "Blob service SAS URL" safely for later use. It is recommended to set a short time span on which the SAS will be valid for security reasons.
Extracting the device IDs from an AppCenter project.
-
Open your AppCenter project on https://appcenter.ms/
-
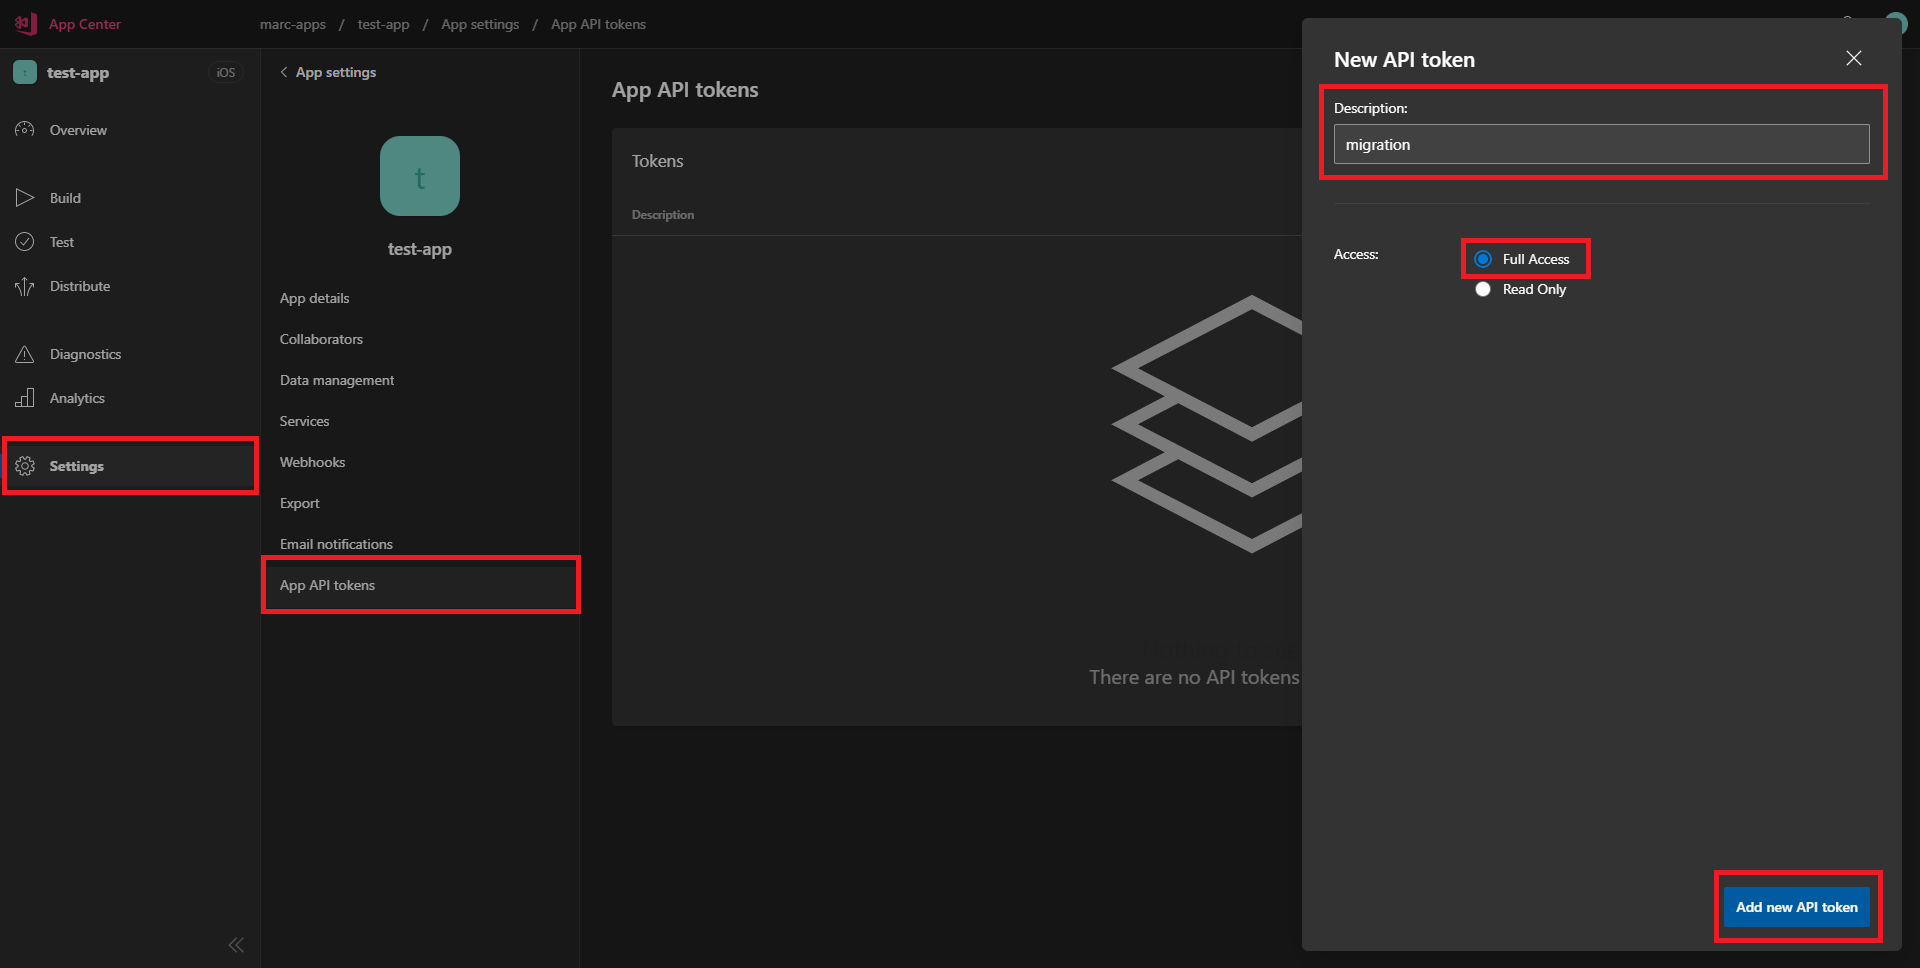
Click "Settings" on the left-side menu.
-
Create a new App API token.
-
Copy the API token to somewhere safe.
-
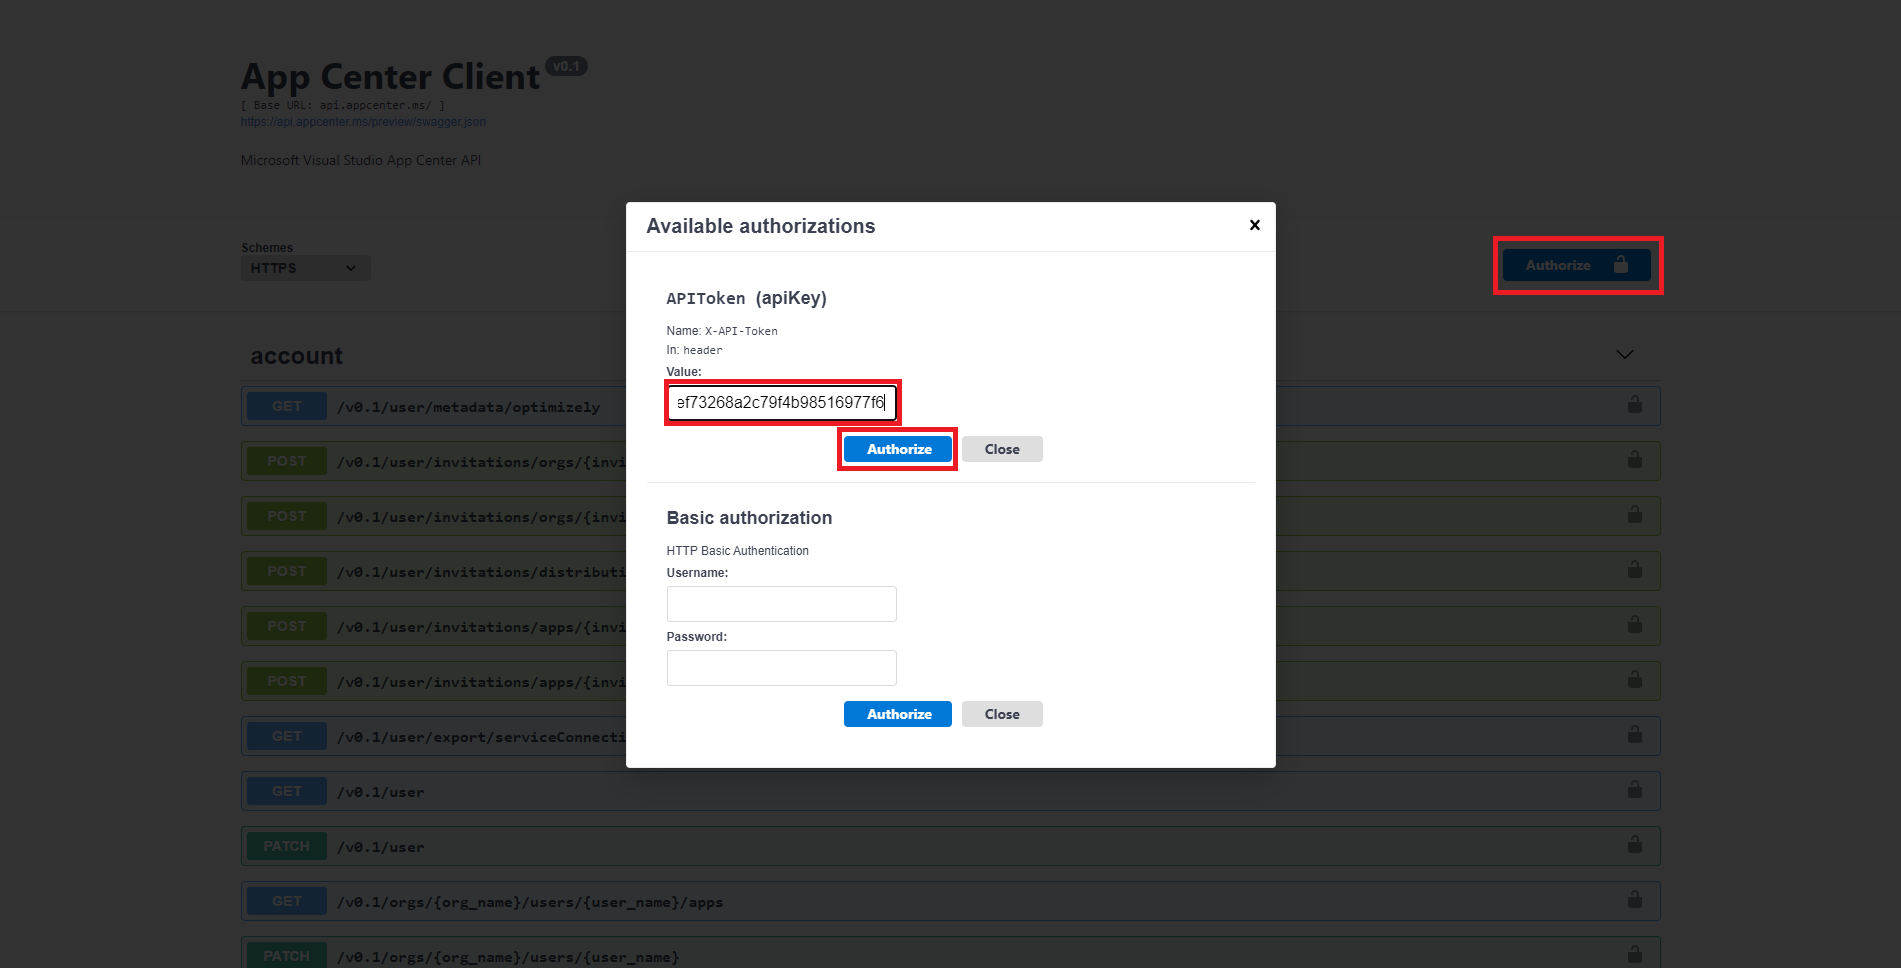
Authorize using your API token.
-
Scroll down to the POST /v0.1/apps/{owner_name}/{app_name}/push/device_exports call and open it.
-
Click "Try it out" and fill in the fields.
- blob_container_sas_uri: Your Azure Blob Container SAS Uri
- owner_name: The name of your AppCenter Project owner. This can be an organization name or username.
- app_name: The name of your project within AppCenter.
-
Click "Execute" and wait. If the call is successful a result will appear containing the unique ID of the backup.
-
You can check the status of the backup if you want using the "GET /v0.1/apps/{owner_name}/{app_name}/push/device_exports/{export_id}" call.
-
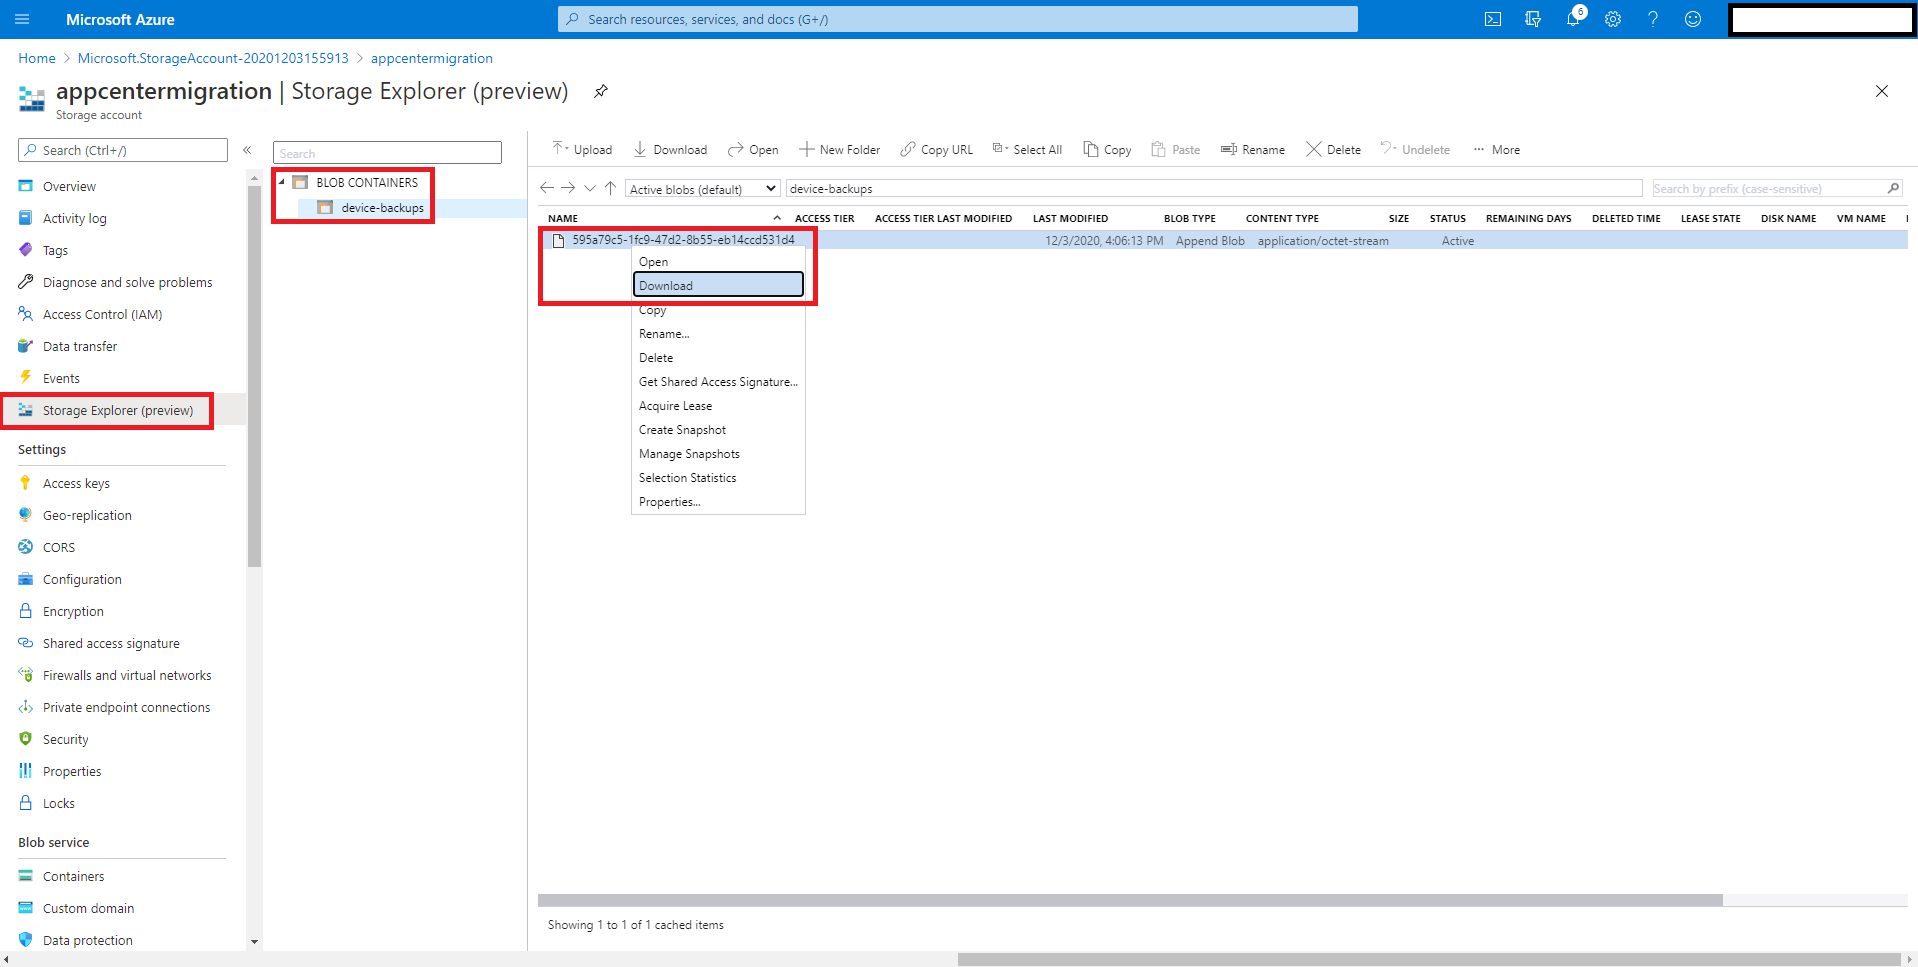
When the backup is done, you can open the Storage Explorer of your Blob Storage instance and download the backup file
-
You now have a JSON file containing all registered devices and their associated platform tokens!🎊
Additional: If you are not planning to use your BlobStorage instance again, you should dispose of it to prevent a possible data breach.
Importing the devices into your provider of choice.
Every push notifications provider has different requirements on how to import existing devices. Luckily most of those providers have tutorials on how to import your exported devices:
